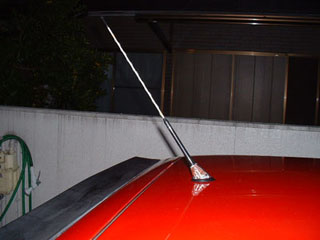
Seijisan provided the report of "The installation of Roof Antenna". Thank you so much ! Regarding this antenna, it is not GTI standard antenna but "stylish antenna" ! :D
Please see Seijisa's Mk2 Golf also.
Please click here !
- Needed part -
"BOSCH" Roof Mounted Amplified Antenna ( with LED lights ! :D )
- Needed tools -
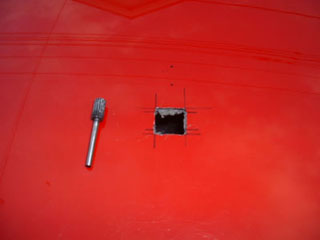
Electric Drill, Rotary Rasp, Sand Paper, Tape measure, Ruler, Indelible Pen ( Magic Marker ), Silicon Sealant ( For waterproofing ) and Universal Tools
- Remove the upholstery of the roof -
1) Remove in order of "rear speaker board", "the anchor of seat belt" and "pillar cover". Regarding the pillar cover, there is blank cap. Therefore, remove the blank cap before removal of screw. Further, there are 3 inlaid places. So remove it by force ! Seijisan used the shoehorn !! :D
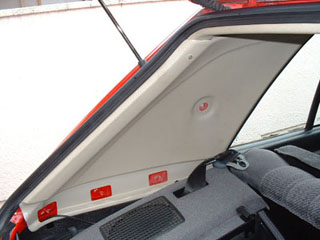
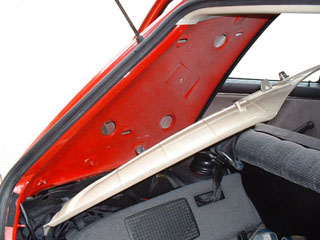
Remove the bow-like board. (Please see below.)
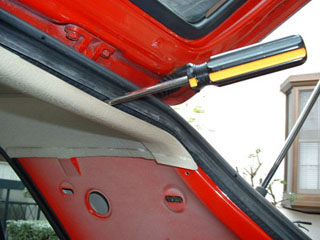
2) Remove the grommet which is fixing the upholstery of the roof. Seijisan used minus driver. The Grommet is easily broken. So please treat carefully. And remove the assistant grips.
3) Remove the upholstery of the roof slowly. It is caught in the rubber trim of both sides. If you remove the upholstery of the roof until center pillar, your hands can enter between the roof and the upholstery of the roof. But if possible, it is safety for you to remove it until front doors.
- Drill the roof -
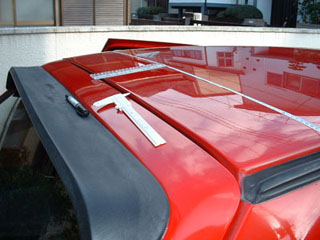
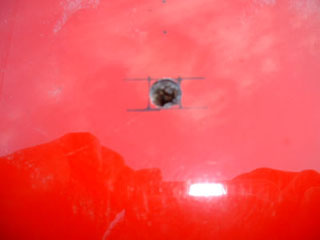
1) Determine the hole position using the tape measure. And mark it. After that, measure the size of the base of antenna correctly. And mark it on the roof. (Regarding this antenna, the size is GTI standard antenna. )
2) Drill the roof. At first, you should use thin drill. ( 1 or 2 mm ) Change the drill step by step. And remove the thermal insulator after drilled.
3) Set the rotary rasp. And expand the hole. Finally, dress the hole using sand paper.
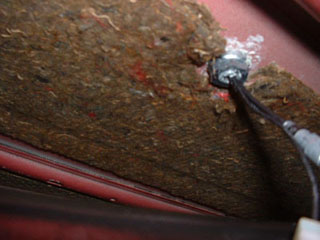
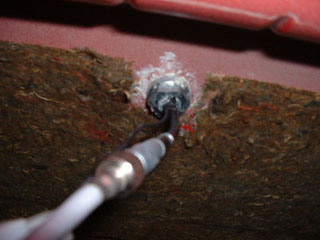
- Installation of the base -
Insert the base into the roof. And fix the roof using nut from the other side of the roof. At that time, please use silicon sealant for waterproofing.
- Electrical wiring -
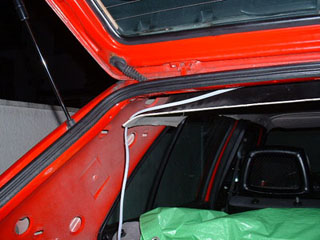
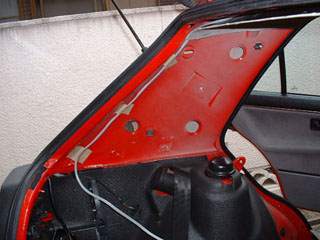
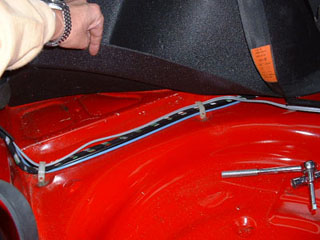
Insert the cable in order of "left pillar", "left tire housing" and "left door step". It is the same route as the existing wiring. Regarding the wiring, you should remove the cover of step and the carpet. It is a troublesome job ! Finally, connect the car audio. By the way, this antenna has amplifier and LED light. So look for acc power line using tester and connect this cable to acc power line.
- Installation of the upholstery of the roof -
It is a reverse procedure.
Finish !!
- Seijisan's impression -
"Although I could get the rare antenna with cable (not dummy), I found the courage to drill the roof. I am still anxious about a leak in the roof. Removal and installation of the upholstery and the wiring were troublesome jobs. Therefore, I do not want to do that again.....
If possible, regarding this work, you should work by two persons.
Especially, there is possibility that the roof board ( the upholstery ) is easily broken. So you had better work by two persons. Regarding the actual antenna, FM receiver sensitivity is no problem. But AM receiver sensitivity got worse slightly."
*******************************************************************************************
Thank you so much for the wonderful report, Seijisan !! :D
I looked at this antenna actually. It was very stylish !
I also would like to install this antenna ! (But is it very difficult for me to work ?! )
